HOW I PAINTED MY KITCHEN CABINETS
This post may contain affiliate links. Please click here for more information.
The next step in fixing up my outdated old 80’s kitchen was to give it a nice new fresh coat of paint! (If you missed part one you can see it here.) I love white kitchens. They are so bright and clean looking. Since I have already painted a kitchen before in Calgary I was eager to get started on this one. First step is to thoroughly clean and de-grease the cabinets. I love to use TSP for this job. It really prepares the wood for the primer. I had to really get into all of the nooks and crannies with my scraper and brush to remove all of the grease build up. If you are using TSP make sure to wear gloves if you want to keep the skin on your hands! Rinse thoroughly before starting to paint. (Check out part 1 and part 3 to learn more about my kitchen)


Next step is to apply two coats of my favorite primer, Zinsser 123. Awesome stuff!
I started with the pantry cupboard. First I removed all of the handle hardware. I painted the first coat of primer on the doors before removing them. It’s a bit easier that way.


After the first coat was applied I removed the hinges from the doors only, leaving the hinge attached to the cupboards. This way I don’t have to worry about what hinge goes where and saves me a lot of work removing them! I labeled the inside of the cupboard and the inside of the hinge hole with some green painters tape and a sharpie so I could tell what door went where.


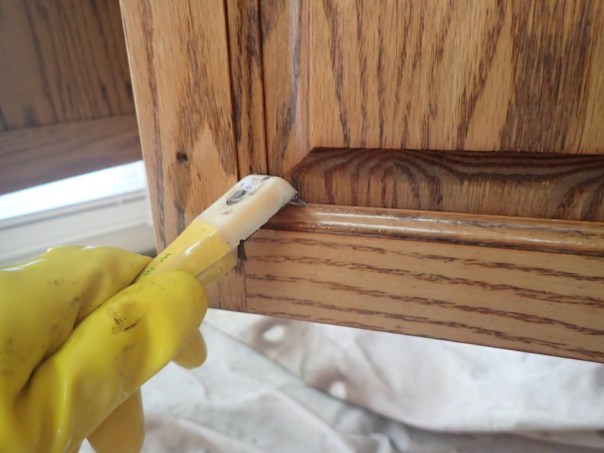
After the first coat of primer was on I noticed that I could see some gaps or cracks where the detail on the door was. Not sure if you understand that description so I will show you a picture.

The solution is to use a paintable caulk. I like to use Alex Plus in the tube. Its much more easy to manage than the stuff you put into a caulking gun. I a put a little on and ran my finger over it to push it into the crack. Then I ran a damp cloth over it to remove some of the excess.

Then I applied the second coat of primer. Doesn’t it look lovely? Ready for the 2 coats of the actual paint now.

One last little detail was to paint the ‘frame’ of the cupboards. If yours are nice and white you don’t need to do this step but the ones in this kitchen were super yellow. You can see where the little round door bumpers were. It was super easy to run my paint roller over them.

At this point you can do a light sand if you really feel the need. As you know I hate sanding so I didn’t. The paint I LOVE to use in kitchens is from Benjamin Moore. It is called Advance and is an alkyd paint but it is water clean up so it is amazing! Also it is a self leveling paint which makes the finished product super smooth.

Now that all of the doors are off you are probably wondering where I put them all to paint them. In the dining room of course! I used some plywood over my saw horses to create long work tables. My next secret is to use board games under each door. I’ve tried all sorts of things to raise up the doors but this works the best for me. The doors are nice and stable to paint. No wobbling! I can even roll the sides with no problem.


Once you have applied the 2 coats of advance let the doors dry for a day or so. You can then pop the doors onto the hinges that are still attached to the cabinets. Easy peasy!
Another key item to refreshing my kitchen was to buy new hardware. If you can’t remember how gross my handles were before click here to take a peek. They were pretty gross. I picked a pretty simple brushed nickel handle. Aren’t they beautiful.

Now it is time to step back and admire the kitchen! First lets look back at the before:


Now for the pretty stuff!


I just love how it turned out! I think I can live with it now until we do a proper renovation. I Still have some ideas to fix up the back splash and the flooring. I will share with you when I figure it all out!
If you missed it you can check out part 1 and part 3 of my kitchen refresh.
Thanks for stopping by. Have a great day!
Karla
Shop related products:


Wow! That is an amazing transformation! I would totally hire you to come and do mine since I’m DIY and time challenged. 😉
Wow! What a difference!
I’ve been wanting to do the same – but I may have to wait until my littles are older. This is lovely!
I love white cabinets! This turned out great!
The cabinets do look fantastic. I considered painting mine but the drawer fronts kept falling off so I didn’t want to do all that work. But I think I found a permanent fix so painting is on the list. Thanks for the inspiration.
Thanks and good luck with your kitchen refresh! You won’t be sorry once you have painted them. It makes such a difference!
Wow! A knock your socks off difference! Looks amazing!
It looks amazing! 😍
It looks like a whole new kitchen!
Thanks Alaina! It feels like a new kitchen. I think I can live with it now until the official reno.
Wow, your cabinets look fantastic! What an amazing transformation!
Thanks Kristen. Its amazing what a little paint can do!